RecyclerList extension makes it easy to efficiently display large sets of data. You supply the data and define how each item looks, and then the RecyclerView library dynamically creates the elements when they're needed.
As the name implies, RecyclerView recycles those individual elements. When an item scrolls off the screen, RecyclerView doesn't destroy its view. Instead, RecyclerView reuses the view for new items that have scrolled onscreen. This reuse improves app’s performance and responsiveness.
In this guide I will show you how to use RecyclerList extension created by @ZainUlHassan with MIT App Inventor
Lets's start, go to http://ai2.appinventor.mit.edu.ezproxy.canberra.edu.au/ and create a new project and
- In Designer View
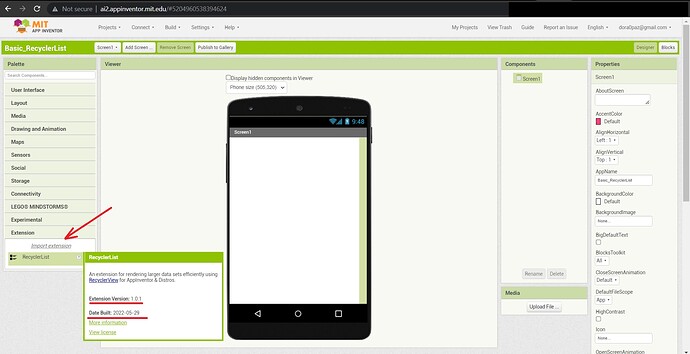
- Import the extension to your project
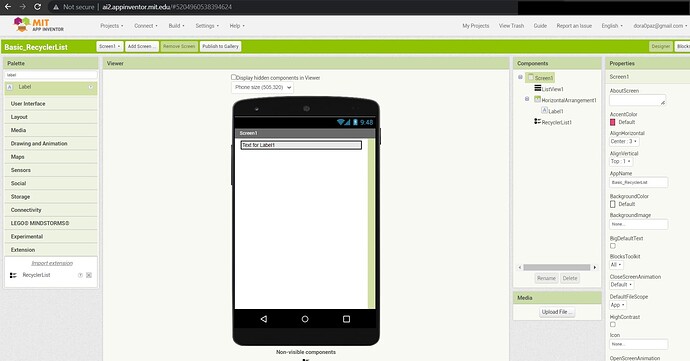
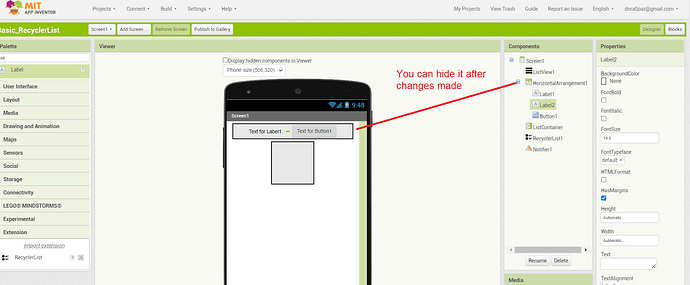
- Add a ListView component and hide it -This requirement is needed only when using AI2 otherwise the app will crash
- Create your layout, for example I will use a list that will contain clients names and I want to have a horizontal arrangement with a label inside and each label will show client's name.
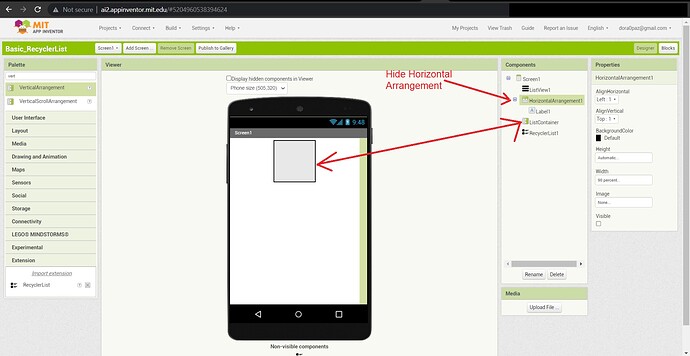
- Insert a Vertical Layout that will serve as the Recycler List's container and hide Horizontal Arrangement
- Block's View
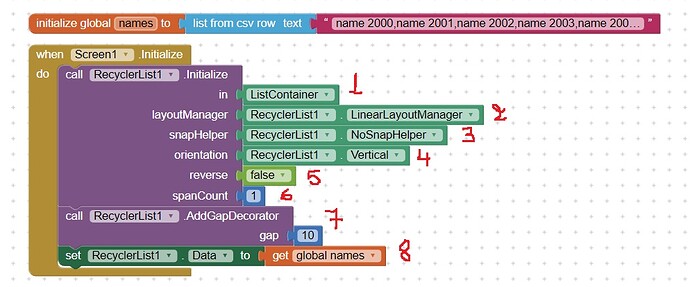
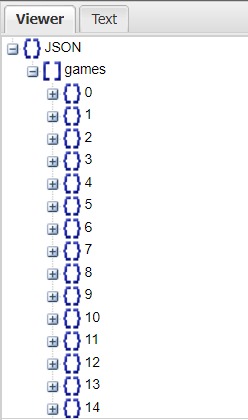
For testing purposes I have created a list that contains 1200 items that I will use to fill my recycler List but you can import data from any database such as Google Spreadsheet, Airtable, Baserow ...
Now lets start coding
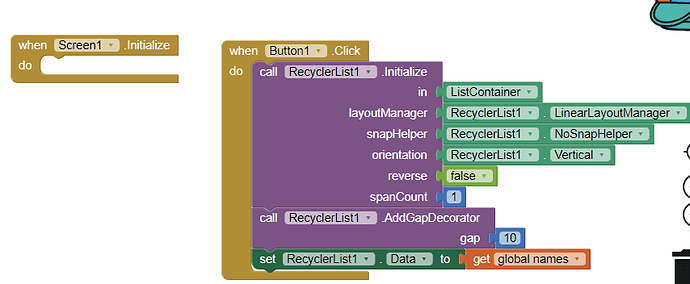
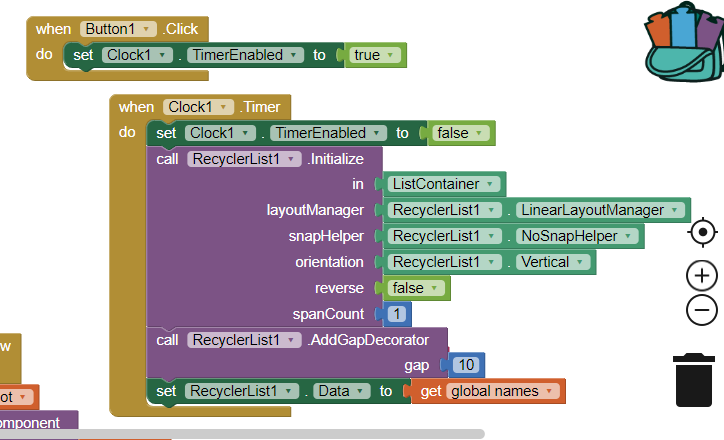
- Initialize the recycler view to ListContainer, your Vertical Arrangement
- Set layoutManager to LinerLayoutManager because we want to create just one column ( If you wish to create multiple columns lists, use GridLayoutManager instead or if you want to create a Masonry Layout, use StaggeredLayoutManager)
- Next set snapHelper to NoSnapHelper as we don’t want any snapping
- Define layout orientation of recycler list to vertical
- Set reverse to false
- Set spanCount to 1 (number of columns) .
- Add gap decorator in order to set a gap between list items
- Set RecyclerList's Data to your global List
After that we will create our UI using onCreateView block
Note that with this block we only create UI we don’t bind any data here. The parameter root is actually the VerticalArrangement that we will be using as ListContainer.
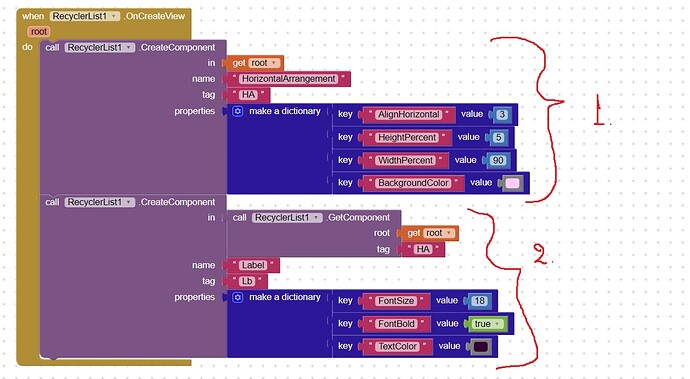
We will create components using CreateComponent block. It takes a layout in which you want to create view, the name of the component, a tag to identify the component inside root view and properties in either a dictionary block or a json string. If anyone ever used Dynamic components extension then he/she is familiar with setting components properties from dictionary blocks.
For example
- I created a Horizontal Arrangement inside root and I set properties
- Align Horizontal to center
- Height to 5%
- Width to 90%
- and Background Color
- I created a Label in the Horizontal Arrangement and I set properties
- Font Size 18
- Font Bold true
- Text Color black
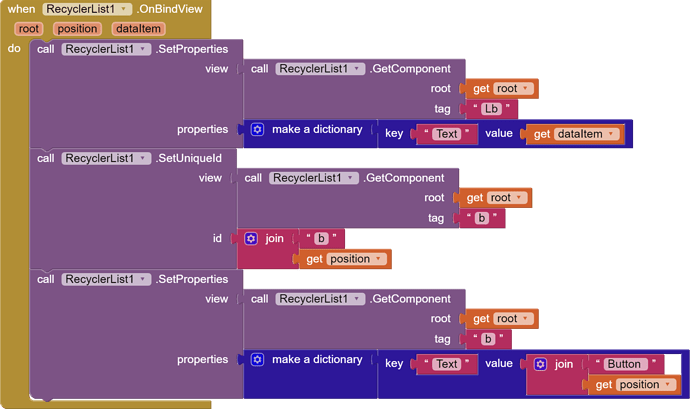
And finally I binded/assigned data to labels. All we need in this example is to set text to get dataItem
Result is
To handle click events on a component, it is recommended to set a unique id by joining component's name with the position to that component using SetUniqueId block so that you can access the position later OnClick event.
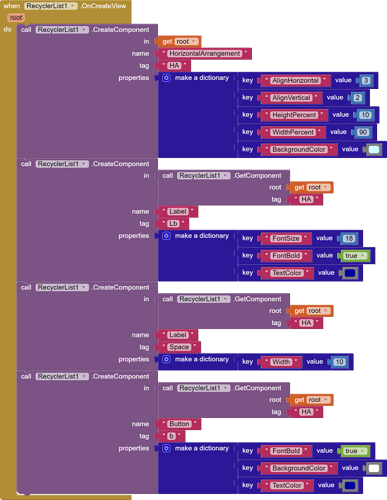
For example I altered a little bit my design and above code and added an empty label as space after first label and a button
and I assigned a unique Id to each button so that I can use it later on when any button clicked event
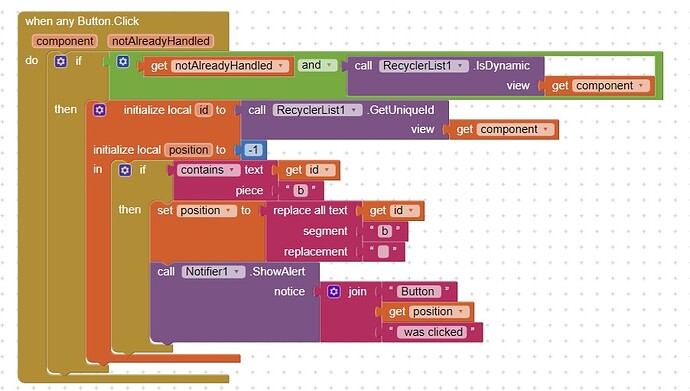
Now we are able to identify which button for example was clicked using when any button clicked event.
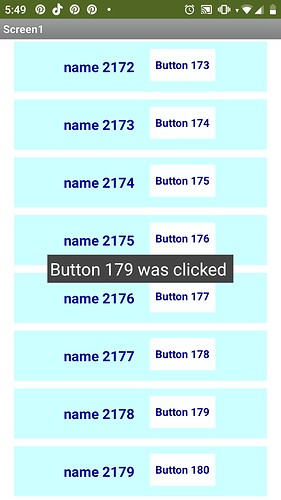
To do that we must first verify whether the click event was not already handled and that the component is dynamic using IsDynamic block. Next we have to save the uique id of button to id variable by using GetUniqueId block. We will also need to create a position variable. In order to extract the position from unique id, we will replace the tag we used when buttons were created from unique id - in my example tag was b. After that we can use this position to show a notifier
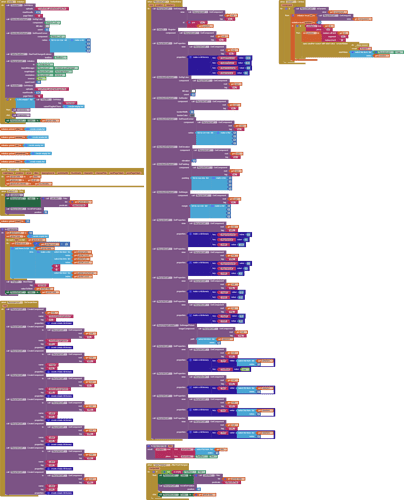
You can download a test aia to see how it works Basic_RecyclerList.aia (84.8 KB)
For a more advanced guide with UI customizations,custom search and use of Google Spreadsheet as database you can see MIT App Inventor - How to render larger data sets efficiently using RecyclerList Extension
